


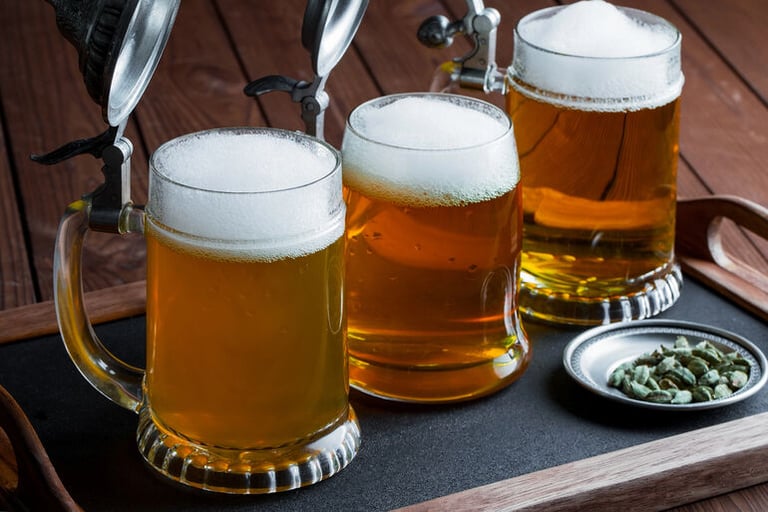
How to Make Cannabis Beer (Non-Alcoholic DIY Guide)
Ready to brew a buzz without the booze? Our DIY guide shows you how to make your own non-alcoholic cannabis beer at home.
 Story by:
Cannabis Blog
Story by:
Cannabis Blog
Combining THC (the psychoactive component of cannabis) with alcohol in the same beverage is largely illegal in most places. To explore the intersection of hop-forward flavor and cannabis-induced relaxation, many homebrewers are embracing non-alcoholic cannabis-infused beer. By carefully crafting a beverage that captures the essence of beer—its aroma, complexity, and character—without the alcohol, brewers can legally and responsibly infuse cannabis. This approach not only complies with regulatory standards but also caters to a growing interest in mindful consumption, offering a nuanced sensory experience with a smooth, mellow high.
This DIY guide is geared toward experienced homebrewers and will walk you through creating a craft-style non-alcoholic cannabis beer, covering all the technical steps – from decarboxylation of cannabis to infusion methods, dosing, and flavor preservation. Always remember to check your local laws and consume responsibly.
Step 1: Decarboxylation – Activating the Cannabis
Before adding cannabis to any brew, you must decarboxylate it. Raw cannabis contains THCA, which isn’t psychoactive; decarboxylation converts THCA into THC, unlocking the potency. In beer infusions, this step is essential to ensure your brew delivers cannabinoids. Here’s how to decarb your cannabis:
- Grind the Cannabis: Grind your buds into a coarse consistency to increase surface area for heating. This helps heat penetrate evenly.
- Oven Heat: Preheat your oven to about 240°F (115 °C). Spread the ground cannabis in a thin layer on a baking sheet lined with parchment paper (to prevent sticking).
- Bake: Heat the cannabis for roughly 30–40 minutes. This slow baking at a moderate temperature will activate the THC without burning off the valuable compounds. You’ll notice a toasty, aromatic smell as it decarbs.
- Cool and Store: Remove from the oven and let it cool completely. The buds will look lightly browned and dried. Store the decarbed cannabis in an airtight container until you’re ready to infuse. (Cooling is important to avoid heat damage to your infusion base.)
Decarbing ensures your cannabis is fully potent for infusion. Skipping this step would result in a weak or non-psychoactive beer, so don’t rush it!
Step 2: Preparing a Non-Alcoholic Beer Base
To make cannabis beer without alcohol, start with a non-alcoholic beer base. You have two main approaches:
- Brew a Non-Alcoholic Beer from Scratch: Use your homebrewing skills to create a near-zero alcohol beer. This can be done by formulating a recipe with a minimal fermentable sugar content or by arresting fermentation early. For instance, you might mash at a high temperature (to create unfermentable dextrins) and use yeast strains that produce minimal alcohol. Another common method is to brew a full beer and then gently remove the alcohol by heat, since alcohol boils off at a lower temperature than water.
Many homebrewers will carefully heat the finished beer to around ~175–180 °F (~80 °C) for 20–30 minutes to evaporate most of the ethanol (monitoring to avoid flavor loss). Vacuum distillation is ideal to preserve flavor, but not usually feasible at home, so low-and-slow heating is your friend. Keep in mind that some flavor and aroma loss can occur, so start with a flavorful beer recipe to retain a solid base after dealcoholization.
- Use a Store-Bought Non-Alcoholic Beer: If you want to skip the brewing process or ensure a consistent base, you can purchase a high-quality non-alcoholic beer and use it as your canvas. Look for an NA beer with a flavor profile you enjoy (hop-forward NA IPAs, malty NA stouts, etc.). Using a commercial NA beer saves time and guarantees the alcohol content is safely near 0.0%.
Whichever route you choose, you should end up with the volume of beer you want to infuse, completely fermented and uncarbonated (if homebrewed) or ready to open (if store-bought). If you brew it, ensure fermentation is finished and clarify the beer as usual, because you’ll be handling it further for the cannabis addition. We will carbonate later, so for now, keep the base flat or gently degassed.
Why no alcohol? Beyond legal reasons, alcohol can increase THC absorption in the body, which can lead to an unexpectedly intense effect. By removing alcohol, we have more control over the experience and can emphasize the cannabis and beer flavors without the complications of cross-fading. Plus, in several markets (like some U.S. states), THC-infused non-alcoholic beer is permitted, whereas alcoholic versions are not.
Step 3: Choosing Your Cannabis Infusion Method
With decarbed cannabis and an NA beer base ready, the next step is to infuse the cannabis into the beer. This is arguably the trickiest part, because THC and other cannabinoids are not water-soluble – they won’t simply dissolve into beer the way sugar or hop oils might. Cannabinoids bind much better to alcohol or fats. Since our beer has no alcohol, we need to use an alternate method to extract THC and blend it evenly. Here are the primary infusion methods to consider:
- Alcohol-Based Cannabis Tincture (then Diluted): This method uses a high-proof neutral spirit to extract THC, after which the tincture is added to the beer in small quantities. To do this, soak your decarboxylated cannabis in high-proof alcohol (such as 190-proof grain alcohol) for a few days, shaking occasionally. The alcohol will strip THC and terpenes from the plant. After infusing, strain out the plant matter. You’ll be left with a potent green/golden tincture.
Because we want a non-alcoholic final product, you should only add a very small measured amount of this tincture to your beer, just enough to get the desired THC dose per serving. For example, adding 50 mL of a tincture into 5 gallons of beer is a tiny fraction of the overall volume (and can keep the final ABV below 0.5%). You can further reduce the alcohol by gently heating the tincture to evaporate most of the ethanol (do this carefully in a well-ventilated area away from flames).
Pros: Very efficient at extracting cannabinoids, and easy to dose consistently.
Cons: Even a small amount of alcohol introduced might be a concern for the truly alcohol-free purist, and making tinctures takes a bit of time. (Remember, in some regions even 0.5% ABV is acceptable for “non-alcoholic”).
- Oil or Butter Infusion (Cannabis Oil Emulsion): Cannabinoids bind readily to fats, so another option is to infuse your decarbed cannabis into a food-grade oil. Cannabis-infused coconut oil is a popular choice. To make it, gently heat coconut oil (or another neutral oil) in a double boiler and add the decarbed cannabis. Simmer on low heat (around 160–180°F, 70–82 °C) for an hour or two – this allows THC to transfer into the oil. Strain out the solids and let the oil cool.
You’ll now have a potent cannabis oil. However, oil and water (beer) don’t mix easily, so you’ll need to emulsify the oil in the beer. This can be done by thoroughly whisking the oil into a small amount of beer or using an emulsifier like liquid soy lecithin to help disperse the oil droplets. Add the emulsion into your batch and stir or shake vigorously to distribute.
Pros: No alcohol involved at all; oil infusion preserves some cannabis terpenes and can be done relatively quickly.
Cons:Oil can affect beer’s mouthfeel and head retention (the foam) and may separate if not well emulsified. It’s crucial to mix extremely well to avoid uneven dosing (cannabinoids clinging in oil globs).
Pro tip: For consistent, food-safe infusions, many homebrewers decarb and infuse in a countertop herbal extractor machine that maintains precise temps and auto-stirs. These units are designed for butter, oils, and tinctures, helping lock in terpenes while extracting cannabinoids evenly. Producing a measured cannabis oil or tincture this way simplifies dosing in Step 5 and improves emulsion stability when you whisk the infusion into beer.
- Cannabis “Dry-Hopping” (Direct Infusion in Beer): This approach mimics dry-hopping by adding decarbed cannabis flower directly into the beer and letting it steep for a period. For instance, you could place the decarbed cannabis in a sanitized muslin bag (like a hop bag) and submerge it in your fermenter or keg of finished NA beer. Let it sit at cool room temperature for 1–3 days, agitating occasionally (gently swirl the container). This will impart herbal aroma and some cannabis flavor to the beer, much like a hop infusion. However, note that without alcohol present, THC extraction will be limited – cannabinoids might not dissolve efficiently into the beer itself. You may get mild potency at best, alongside the flavor. If your goal is primarily flavor and aroma (and perhaps a light buzz), this method is simple.
Pros: Easiest method – just like adding hops, and it preserves a lot of aroma; no additional ingredients needed.
Cons: Inefficient for psychoactivity – much of the THC may remain in the spent cannabis. (One workaround some brewers use: add a small amount of a neutral spirit into the beer to raise the ABV to ~1–2% during this steep, to improve extraction, but this, of course, adds some alcohol and defeats a fully NA designation.)
- Commercial Water-Soluble THC Extracts: With the rising cannabis beverage trend, there are now water-soluble THC concentrates available (often nano-emulsified THC). These are designed to disperse evenly in drinks. If you have access to such a product (some dispensaries sell THC drink drops or powders), you can simply dose your beer with it per the product instructions. These extracts bypass the solubility problem by using nano-emulsion technology.
Pros: Easiest and most reliable for consistent dosing; no taste of raw cannabis if the product is flavorless.
Cons: Can be expensive; not as hands-on “homebrew” as the other methods; availability varies by region.
Choose the infusion method that best suits your comfort level, skillset, and available equipment. Many seasoned homebrewers favor a hybrid technique, such as incorporating cannabis much like a dry-hop addition to enhance aroma and flavor, then supplementing with a precisely measured tincture to ensure consistent potency.
Regardless of the method, sanitation is paramount. Treat every cannabis addition with the same diligence you apply to hops or specialty grains: sanitize all contact tools—from muslin bags and droppers to storage containers—to preserve the integrity and safety of your brew.
Step 4: Infusing the Cannabis into the Beer
Now it’s time to combine the cannabis extract with your beer base. Work in a clean environment and think about even distribution – you want each bottle or serving of beer to have roughly the same THC content.
If you brewed your NA beer and it’s still in a fermenter or keg, you can add your infusion directly there. If you’re using a store-bought NA beer, you’ll need a larger vessel (like a sanitized gallon jug or bucket) to mix the beer with the cannabis infusion, since opening bottles will release carbonation (you’ll recarbonate later). Here are the infusion steps for different methods:
- Tincture Addition: Calculate how much tincture to add based on the desired dosage (see Step 5 on dosing). Gently stir or shake the tincture into the beer. For a large batch (e.g., 5 gallons), you can pour the tincture in and use a long, sanitized spoon to stir. Ensure it is mixed thoroughly – the tincture (being alcohol-based) should disperse nicely in beer. Tip: It may help to mix the tincture with a small amount of beer first, then blend that into the larger batch, to ensure even dilution.
- Oil Emulsion Addition: If using oil, make sure the oil is in a very fine emulsion (tiny droplets). Add the emulsified cannabis oil into your beer and stir continuously. You might use a sanitized whisk or an immersion blender briefly (taking care not to aerate the beer too much, which can cause oxidation off-flavors). The goal is to keep the oil suspended in the liquid. A pinch of soy lecithin can stabilize the emulsion. This mixture may be cloudy – that’s normal. Let it sit for a while and watch for separation; if oil rises to the top, mix again until it stays fully dispersed.
- Direct Infusion (Dry-Hop Style): Drop in the bag of decarbed cannabis (or loose decarbed buds, though containment in a mesh bag makes cleanup easier). Ensure the vessel is sealed (to avoid air exposure and loss of aroma) and let it steep at room temperature for the desired time (1–3 days typically). Swirl or gently shake the vessel a couple of times a day to increase contact. After infusion, remove the cannabis bag and discard it. The beer will now carry a cannabis scent and some resins. If you plan to also add a tincture or extract for more THC, do so after removing the solids, to make stirring easier.
- Water-Soluble THC Product: Follow the product guidelines – often it’s as simple as stirring in a measured milliliter of liquid or a scoop of powder per set volume of beer. These products are designed to dissolve clearly. Stir until fully combined.
At this stage, avoid any vigorous boiling or heating of the beer with cannabis in it. You should treat it like adding a flavor extract. High heat could evaporate aromatic terpenes and degrade cannabinoids. Keep everything cool or at room temperature during mixing to preserve the delicate flavors and aromas.
Once combined, taste and aroma-test a small sample (just a sip) if you like – you might notice a herbal, bitter edge from the cannabis. Don’t worry if it’s a bit more bitter or grassy than expected; we will discuss balancing flavors next.
Step 5: Dosing and Potency Control
One of the most important aspects of making cannabis beer is getting the dosage right. Unlike alcohol, THC’s effects can creep up on you and be very potent if overdone. Here’s how to manage dosing in your brew:
- Target THC per Serving: Decide how many milligrams of THC you want per bottle or glass (12 oz (~355 mL) serving). For many beginners, 5–10 mg THC per serving is a moderate range. Experienced users might go up to 10–20 mg, but it’s usually wise to err on the lighter side for a drink. Remember, you can always drink a second bottle if it’s too mild, but you can’t undrink one if it’s too strong. For reference, commercial cannabis beers often have 5 or 10 mg THC per can.
- Calculate Cannabis Needed: Estimating from your cannabis potency is key. For example, if your cannabis is 15% THC by weight, 1 gram of it contains about 150 mg of THC (assuming full decarb and extraction efficiency). However, home extraction isn’t 100% efficient – some losses occur. A safe assumption might be 50–75% efficiency for oil or tincture infusions. So that 1 gram (150 mg THC) might yield ~75–100 mg effective THC in your beer. If you want 5 mg per serving and you have, say, 50 servings (5-gal batch ≈ 640 oz ≈ 53 12-oz servings), that’s ~250 mg total THC needed. Using our example potency, ~3–4 grams of 15% cannabis decarbed and well-infused could get you in that ballpark. Always round down if unsure – you can make up potency by adding a bit more tincture later, but you can’t remove THC once it’s in.
- Measuring the Infusion: If you made a tincture, you can calculate how many milliliters of tincture equal the target mg of THC. For instance, if 10 mL of tincture contains ~100 mg THC, and you want 5 mg per beer in 50 beers (250 mg total), you’d add 25 mL of that tincture to the batch. With oil, it’s harder to measure evenly, but you might infuse a known amount of oil (say 2 tablespoons of oil with X grams of cannabis) and then add all that oil to the batch to approximate the dose. Consistency is crucial – ensure the cannabis extract is evenly distributed in the beer, otherwise one bottle might be weak and another very strong.
- “Start Low and Go Slow”: This adage holds. If you’re unsure of the strength, target the lower end of dosing. It’s easy for a pleasant cannabis beer experience to turn uncomfortable if each bottle is packed with 25+ mg THC. We recommend starting with low doses, especially for newcomers, and clearly labeling any infused beer you share. Treat it with the same care you would a potent edible. Everyone’s tolerance is different, so what seems mild to you could overwhelm someone else. Always inform anyone who might drink it that it contains cannabis and how much.
- Testing a Sample: After infusion, you might bottle or pour a small test serving and consume just a portion to gauge potency (wait at least 1–2 hours, as cannabis beverages, like edibles, can take time to kick in). This can be tricky since effects vary, but it can give a rough idea if you overshot or undershot. If it feels too strong, you can dilute the batch with more plain NA beer. If too weak, you could add a bit more tincture or extract before final packaging.
In summary, dosing is about math and mindfulness. Measure carefully, keep notes of your calculations, and when in doubt, underdose rather than overdose. You can always supplement an under-dosed cannabis beer by, say, pairing it with a snack made with a little cannabis, but if you over-dose the beer, you’re stuck with a very strong brew that might not be enjoyable.
Step 6: Preserving and Enhancing Flavor & Aroma
One challenge when making cannabis-infused beer is balancing the distinctive flavors of cannabis with your beer’s profile. Cannabis, especially in decarbed form, can introduce earthy, herbal, and bitter notes that might clash or overpower a delicate beer if not handled thoughtfully. Here’s how to preserve the best flavors and aromas in your cannabis beer:
- Choose a Complementary Beer Style: When formulating or selecting your NA beer base, opt for styles that can stand up to or meld well with cannabis’s flavor. Hoppy styles like Pale Ales or IPAs are popular choices, as the terpenes in hops and cannabis are cousins and can complement each other (many hops have piney, citrusy, or dank notes similar to cannabis). A malty amber or stout can also work if you’re aiming to pair cannabis’s earthy tones with roastiness. Lighter styles (like a light lager) may be more easily overwhelmed by cannabis, though they can still work if you keep the cannabis quantity modest or use a strain with gentle flavor.
- Add Cannabis at the Right Time: To preserve aroma, it’s best to avoid boiling the cannabis in the wort. Just as dry-hopping captures volatile hop aroma, adding cannabis after the beer has cooled (or post-fermentation) captures more of its fragrance. We incorporated our cannabis after fermentation in this guide, which is ideal to keep those terpenes intact. During decarboxylation, use a moderate temperature as described – excessive heat can destroy terpenes. Some brewers even decarb in a closed container (or oven bag) to trap more aroma, though beware of vapor buildup.
- Flavor Adjustments: If tasting your infused beer reveals a strong bitter or grassy note, consider creative additions to balance the flavor. For example, adding a bit of citrus zest (orange or grapefruit peel) or a handful of fresh herbs like basil or rosemary during a short secondary conditioning can brighten and mask rough edges. Extra dry hops can also help – since hops share some terpene profiles with cannabis, you can amplify the pleasant piney or fruity notes. We suggest adding citrus peels, herbs, or additional hops during brewing to help balance cannabis bitterness. A small addition of ginger (as used in some cannabis beer recipes) can provide a zesty distraction from any skunky hints. Just be careful not to introduce anything that could contaminate your beer; sanitize additions or use alcohol-based tinctures or flavorings when possible.
- Terpene Oils: For advanced flavor tweaking, you can use isolated terpenes (sold in some specialty shops) to enhance specific notes. For instance, a few drops of food-grade limonene can boost citrusy aroma, or pinene can elevate pine-fresh notes. These can be added at bottling/kegging to fine-tune the aroma. Go sparingly – terpenes are potent! This is an optional step for the perfectionists and not necessary in most cases if you choose a good strain and beer combo.
- Clarity and Appearance: Expect that adding cannabis (especially as oil or tincture) might add a slight haze to your beer. This is normal – many dry-hopped beers are hazy too. If clarity is important to you, cold-crash the beer after infusion and consider using finings. However, note that oils from cannabis can reduce head retention (your beer’s foam), since oils collapse foam. A trick to mitigate this is to use some protein-rich grains (like wheat or flaked barley) in your beer recipe for better head retention, or add a head-retention agent. Still, with moderate cannabis oil content, you should get at least a small head on your pour.
Ultimately, embrace the unique flavor profile of your cannabis beer. The goal isn’t to completely hide the cannabis character, but to harmonize it with the beer. Many people describe the mix of hops and cannabis as “dank,” “resinous,” or “herbaceous,” which can be quite enjoyable when balanced. With the right strain and recipe, you’ll find that cannabis can add a fascinating new layer to the beer’s bouquet.
Step 7: Selecting Cannabis Strains and Flavor Pairings
Just as different hop varieties lend distinct flavors to beer, different cannabis strains have unique terpene profiles that can influence the taste and aroma of your brew. Choosing the right strain can elevate your cannabis beer from good to exceptional. Here we pair strain flavor profiles with beer styles, so you can pick a combination that sounds appealing:
- Citrusy & Fruity Strains: Strains high in limonene or myrcene often have bright citrus or tropical fruit aromas – think of varieties like Super Lemon Haze, Tangie, Grapefruit, Strawberry Cough, or Mimosa. These citrusy strains pair wonderfully with lighter, refreshing beers. For example, a citrus-forward sativa might complement a hoppy pale ale or a citrusy IPA, enhancing those grapefruit and orange hop notes. A slice of actual citrus peel in the brew (as mentioned earlier) can further marry the flavors. If you’re brewing a witbier or saison (in NA form), a lemony strain could play nicely with those styles too.
- Earthy & Piney Strains: Many classic strains feature earthy, pine, or woodsy tones – often from terpenes like pinene, humulene, and caryophyllene. Examples include Northern Lights, OG Kush, Jack Herer, and the legendary Acapulco Gold. These earthy/piney strains shine in beers with rich or robust profiles, such as amber ales, brown ales, or stouts. The roast and malt can provide a grounding base for the cannabis’s forest-like notes. For instance, Acapulco Gold seeds produce a strain known for a complex earthy sweetness with a touch of pine and a subtle citrus undertone. This makes Acapulco Gold a great candidate for pairing with a malty amber or a spicy winter warmer, where its spicy, piney aroma can complement caramel malt or rye spice. Likewise, a West Coast IPA heavy on piney hops (think classic West Coast IPA) could also harmonize with a pine-scented strain, effectively doubling down on that resinous pine forest character.
- Herbal & Floral Strains: Some strains give off herbal, tea-like, or floral aromas (e.g., Lavender, Chamomile, or certain phenotypes of Haze). These can pair with more delicate beer styles or specialty brews. For example, a strain with lavender or chamomile notes might pair with a farmhouse ale or a Belgian wit that has herbal spice elements. Floral strains could also be lovely in a hibiscus or chamomile-infused NA beer, if you’re experimenting beyond traditional styles.
- Sweet & Dessert-Like Strains: On the other end, strains that smell like sweet berries, vanilla, or even chocolate (often indica-leaning strains like Blueberry, Gelato, Wedding Cake, etc.) can be fun to pair with dark beers or dessert beers. A non-alcoholic chocolate stout infused with a Sweet Berry strain could accentuate a rich, sweet flavor profile. Sweet strains tend to enhance dessert-like flavors, so consider this if brewing a pastry stout or a porter with vanilla.
Keep in mind that these are just suggestions – personal preference rules the day. Part of the fun is experimenting: you might find that a piney strain in a light lager gives an interesting “gin-like” twist, or a citrusy strain in a dark stout creates a chocolate-orange effect. There’s a world of flavor to explore since both hops and cannabis boast dozens of terpenes that interact in complex ways.
Also, consider CBD-rich strains if you want the flavor and some relaxation without as much psychoactive effect. CBD strains (with low THC) can be infused similarly and provide more of a calming effect than a high. They often still have great terpene profiles to contribute aroma.
Finally, if you grow your cannabis, choosing a trusted seed source for the strain you want is crucial. Brewing with fresh, well-cured homegrown buds can be very rewarding – you’ll taste the fruits of your labor in your beer. Make sure any cannabis you use (homegrown or store-bought) is free of pesticides and mold, as those could carry into your beer and pose health risks or off-flavors.
Step 8: Carbonation and Packaging
After successfully infusing and flavoring your cannabis beer, you’ll need to package it with proper carbonation – after all, beer isn’t quite beer without some fizz. Carbonation will also help lift the aromas of hops and cannabis when you crack open a bottle. Here’s how to finish up:
- Re-yeast (if necessary): If you brewed from scratch and then heated your beer to remove alcohol, you likely killed off the yeast. In that case, if you plan to bottle-condition (natural carbonation in the bottle), you may need to add a pinch of fresh yeast at bottling along with priming sugar. Choose a neutral ale yeast and use a very small amount, as the beer is now quite low in fermentable sugars. Alternatively, since the goal is to keep this non-alcoholic, you might prefer forced carbonation with CO₂. This means kegging the beer and using a CO₂ tank to carbonate, or using a product like a carbonation cap on PET bottles. Force carbonation is the surest way to add fizz without adding any further alcohol.
- Priming for Natural Carbonation: If kegging isn’t an option and you want to bottle-condition, calculate a priming sugar amount that will yield a safe CO₂ volume (aim for about 2.5 volumes of CO₂ for ales). For a 5-gallon batch, roughly 3–4 oz of corn sugar is typical. Since the beer is effectively fully fermented (and nearly 0% ABV), adding this sugar will create a small amount of alcohol (typically well under 0.5% ABV, which is the legal NA threshold).
Drop your priming sugar (dissolved in boiling water and cooled) into the bottling bucket, gently rack the infused beer in, and stir carefully to mix – avoid oxygen pickup. Then bottle in sanitized bottles and caps. Keep the bottles at room temperature for a week or two to carbonate. (If you added fresh yeast, they should carb up; if not, it may take longer or not fully carb if the original yeast was too stressed or killed off by alcohol removal or cannabis compounds.)
- Force Carbonation: For those with a kegging setup, transfer the beer to a clean, sanitized keg. Chill it and force carbonate at ~20 PSI for 2–3 days, or use your preferred force-carb schedule. This is quick and maintains the pure NA status. You can then bottle from the keg using a counter-pressure filler or enjoy on draft.
- Pasteurization (if needed): If you bottle with residual sugars (priming), be aware of the total fermentables present. Since our beer is non-alcoholic, we intentionally limited fermentable sugars initially. There is a very small risk that any complex sugars or the cannabis infusion (if it contained something like sugar-based syrup) could ferment and overcarbonate over time.
Some commercial cannabis beers are pasteurized to stop any further activity. As a homebrewer, if you kept everything sanitary and only added the measured priming sugar, you should be fine as long as you don’t store the bottles in warm temperatures for long periods. When in doubt, you can pasteurize bottles by placing them in ~140°F water for 20 minutes (taking great care to avoid bottle bombs). Do not pasteurize if you use glass bottles not rated for heat – they can break. This step is usually not required, but I mention it for completeness.
- Storage: Store your finished cannabis beer in a cool, dark place, just like regular homebrew. THC and hop flavors can degrade with light and heat. Refrigeration is ideal once carbonated. And as always, clearly label the bottles as containing THC/cannabis, and keep them out of reach of children or anyone who shouldn’t accidentally consume cannabis. A good labeling practice is to include the estimated mg of THC per serving on the label for safety.
After carbonation, chill a bottle and enjoy the fruits of your labor! When you pour it, observe the aroma – you might get a nose full of hop, grapefruit, and cannabis funk mingling enticingly. The head might have a slight green tint or herbal aroma. On tasting, you’ll experience the beer style’s malt/hop character interwoven with cannabis’s unique taste. It’s a special experience for a beer enthusiast who also appreciates cannabis. Just remember to sip slowly at first and see how the effects build, especially if you are new to cannabis drinks.
Exploring the Future of Flavor
Crafting your non-alcoholic cannabis beer is a sophisticated blend of brewing artistry and botanical innovation. Unlike traditional homebrewing, this process calls for added precision, from decarboxylating your cannabis to activate THC, to selecting infusion techniques compatible with a non-alcoholic base. Achieving harmony between hop character and cannabis essence demands careful balance, but the result is a distinctive beverage that captures the depth and nuance of beer alongside the mellow, modern appeal of cannabis. It’s a rewarding pursuit for brewers looking to explore the future of flavor and functionality in adult beverages.
By focusing on a non-alcoholic base, we stay within legal boundaries and avoid the harsher effects of combining alcohol with cannabis. We’ve covered the key steps: you learned how crucial decarbing is, discovered multiple infusion techniques (tinctures, oils, dry-hopping, etc.), saw how to dial in a safe and enjoyable dose, and learned to preserve or even enhance the flavor and aroma so that your final beer is as delicious as it is novel.
A few final tips to leave you with: Always prioritize safety and responsibility – clearly communicate the presence of THC in your beers to anyone who might drink them. Enjoy your cannabis beer in a safe environment, and don’t plan to drive or do complex tasks afterwards. Treat it with the respect you’d give any beverage or edible. Also, keep experimenting: maybe next time you’ll try a CBD-infused brew for a mellower social drink, or play with different strains and hop combinations to discover the ultimate “dank IPA”. The possibilities at this intersection of brewing and cannabis are endless and exciting.
Now that you know, you can confidently brew up a batch of cannabis beer that suits your palate—whether you’re after a hop-forward IPA, a smooth gold lager, or something entirely experimental. Invite a few friends (who are informed and willing), crack open some bottles of your homemade green brew, and savor the experience. As always in both brewing and cannabis: start low, go slow, and enjoy the journey. Cheers and happy brewing!
Disclaimer:
The information provided in this article is for educational and informational purposes only and does not constitute legal advice. Cannabis laws vary significantly by jurisdiction and are subject to change. Readers are strongly encouraged to consult local, state, and federal laws, as well as seek guidance from a qualified legal professional, before attempting to brew, consume, or distribute any cannabis-infused products.
The Beer Connoisseur® does not endorse or promote illegal activity in any form and assumes no responsibility or liability for any actions taken by readers based on the content of this article.


Comments 0
No Readers' Pick yet.